I learned that many good photographers, once these become, they become tight. Begin to keep their secrets to themselves, are less prone to confrontation and to share, unless you paid for it.
that I am not a photographer, I can afford to share what I learned, a little experimenting and a little looking on the internet.
I think that sharing always do well: raising the technical level of others and encourages everyone to do even better.
One technique that gives me more satisfaction working on digital photos is the ability to intervene on the sharpness of the shot.
Photoshop is able to make incredible leaps to our photos, in terms of image quality. In this particular case helps us to grasp the finer details of the shot.
You can follow various paths to reach this purpose: common to all these is the need to apply these techniques as the last step final (along with noise reduction) ... it is necessary and essential to apply these techniques at the end of your workflow ... and absolutely to be applied only after you have resized the pictures ...
fact if you apply the techniques for clarity or to reduce noise, before you change the resolution, negate the benefits that these techniques lead after shooting if you scale: this is because the pixels will be resampled again by software which will modify the impact of your actions.
These are two techniques that I know, practically equivalent to each other ... I have always used the technique a reality ... in a few months ago I discovered the technique 2, slightly more power and flexibility for the reasons which I will list later.
start .....
Technique 1: Lab Color
once prepared and completed the editing of your image as a last step, click on in Photoshop Image> Mode> Lab Color ( PS asks you to merge visible layers: give ok)
click on the channels palette and select the channel brightness.
your color image is now displayed in b / n.
go to Filter> Sharpen> Unsharp Mask.
applied the mask with values \u200b\u200bappropriate to your image (having low values \u200b\u200bof radius and threshold ) increase until you see the richness of detail (do not worry b / n).
After adjusting the amount of detail you want to emphasize go back to Image> Mode> RGB ... and your screen will be in color.
Following this method the colors are not affected because it will act only on the fine details of the channel brightness (white and black). If you compare the shot before and after applying this technique you will see major changes (actual pixels or view 100% zoom).
save your file.
Technique 2: Sharpen
The latest versions of PS have implemented the functions of conflict with Smart Sharpen.
If you have the latest versions of PS I recommend the second way.
Once your image ready, remaining time in RGB color space ( Image> Mode> RGB ) apply Filter> Sharpen> Sharpen ... with some details:
low values \u200b\u200bof range: from 0.1 to 0 for small images 0.7-0, 8 for large ones.
delete: select Lens Blur
and flagged to "correct" set the value
factor to your taste.
The benefit of using the technique 2 is connected to the possibility of applying the effect of a sharper image on a single level, separate from all others ... not at all levels joined together as in the case of technique 1.
This is a great advantage.
Why? Why can act selectively .
After completing the work on the image, I can merge all the layers, creating one.
Without this double layer the only visible and apply it only on this upper level, method 2.
After that apply a black mask layer (layer mask) and then hiding all the top level (on which I have applied the technique 2 for clarity).
Now I can act on this all-black layer mask, using a white brush ...
am selectively in this way that I prefer to see the details (use a large white brush and low hardness, painting over the black layer mask, which will become white just where you like).
Applying this sharpening, and leverage the details in a selective way you will get a more realistic and engaging with great control ... managing the appearance of artifacts, which is inevitable even with the best photo-editing software, in areas of 'image, where you do not need amplification for details.
leveraging the vast power of the mask layer can selectively act on other ... image parameters such as the saturation in this area have begun to apply it only in a targeted, not the whole picture.
How? duplicating the layer, saturating the top ... and playing with the mask layer and become visible only where saturation seems more appropriate.
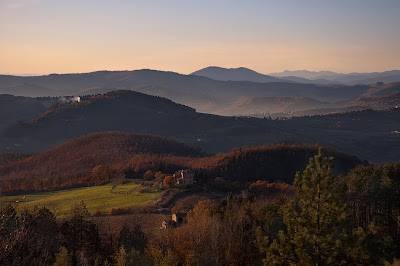
The photo at the beginning, this has been addressed with this principle.
Assuming that the image was still quite good even at the start: great light of late afternoon, good visibility, tripod, very closed aperture (f/16 if I remember correctly), remote shutter release, mirror lock up, step in raw ... all care that make a difference anyway.
Once you start shooting is good touches to the software: Photoshop with its layers and the layer mask offers one of the most powerful tools that technology makes available to our digital images.
Know some more technical and use it in creative ways to help our shots, no doubt.
